Updating Lightdash to the latest version
Local deployments
If you're running Lightdash on your own laptop using Docker, you just need to instruct Docker to pull the latest version of Lightdash:
docker pull lightdash/lightdash
Now restart Lightdash and you'll be upgraded to the latest version.
Kubernetes/helm deployments
If you install Lightdash into kubernetes using our community helm charts you need to update your helm chart repository and upgrade your deployment.
helm repo update lightdash
helm upgrade -f values.yml lightdash lightdash/lightdash
Heroku deployments
Follow these instructions if you used the "deploy to heroku" button to deploy Lightdash.
1. Fork the Lightdash repository on Github
Create a github account if needed, login, and hit "fork" on the Lightdash GitHub repo for heroku

2. Connect Heroku app to Github repo
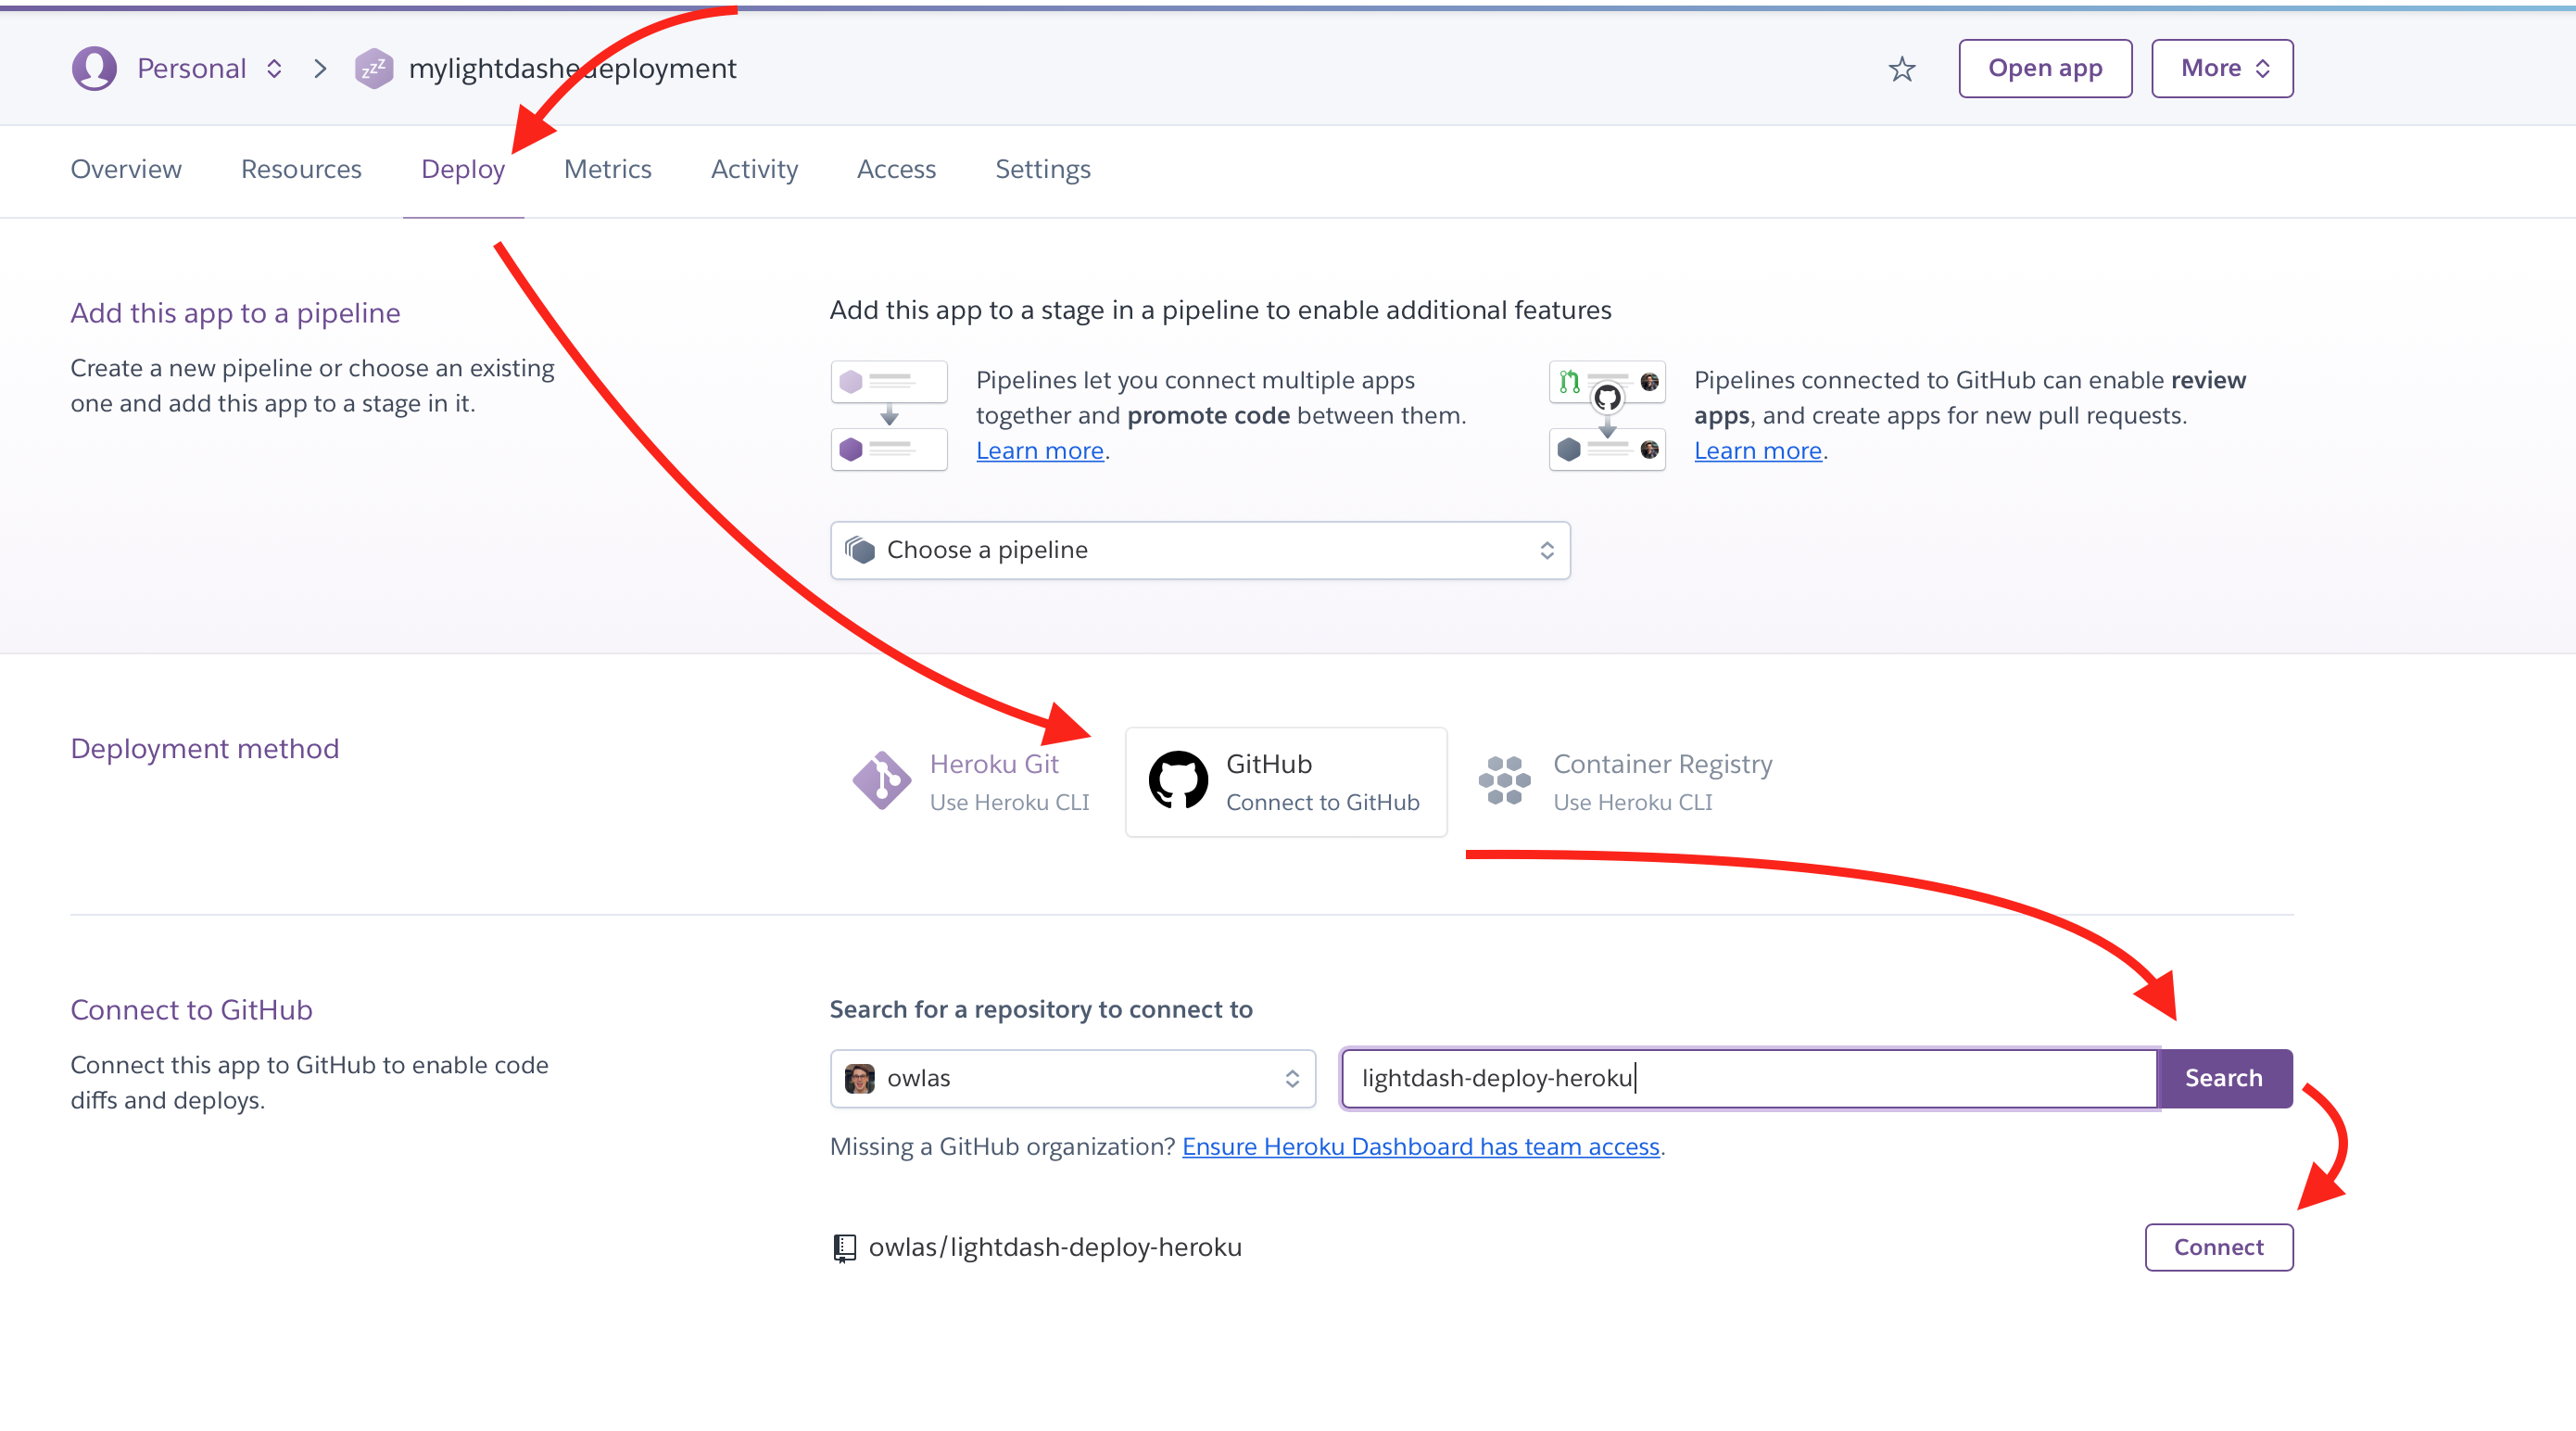
Navigate to your Heroku dashboard and select the Lightdash app you want to upgrade.
Under the "Deploy" tab for your app, follow these steps:
- Scroll to "Deployment method" and select "GitHub"
- You may be asked to sign-in to github to link your account with Heroku
- Scroll to "Connect to Github"
- Select your user and search for the "lightdash-deploy-heroku" repo
- Click "Connect" for the repository
yourusername/lightdash
If you've connected successfully you should see the following message:

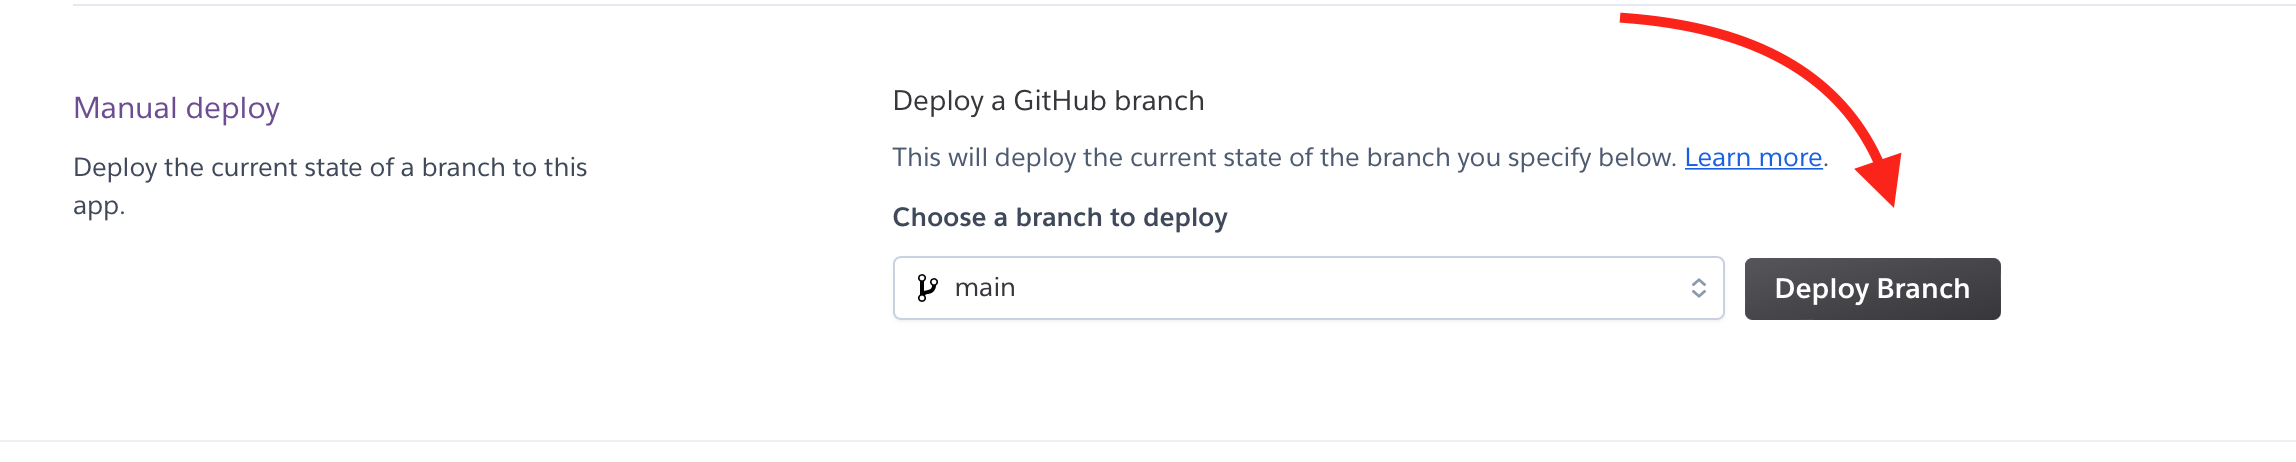
3. Deploy latest Lightdash version
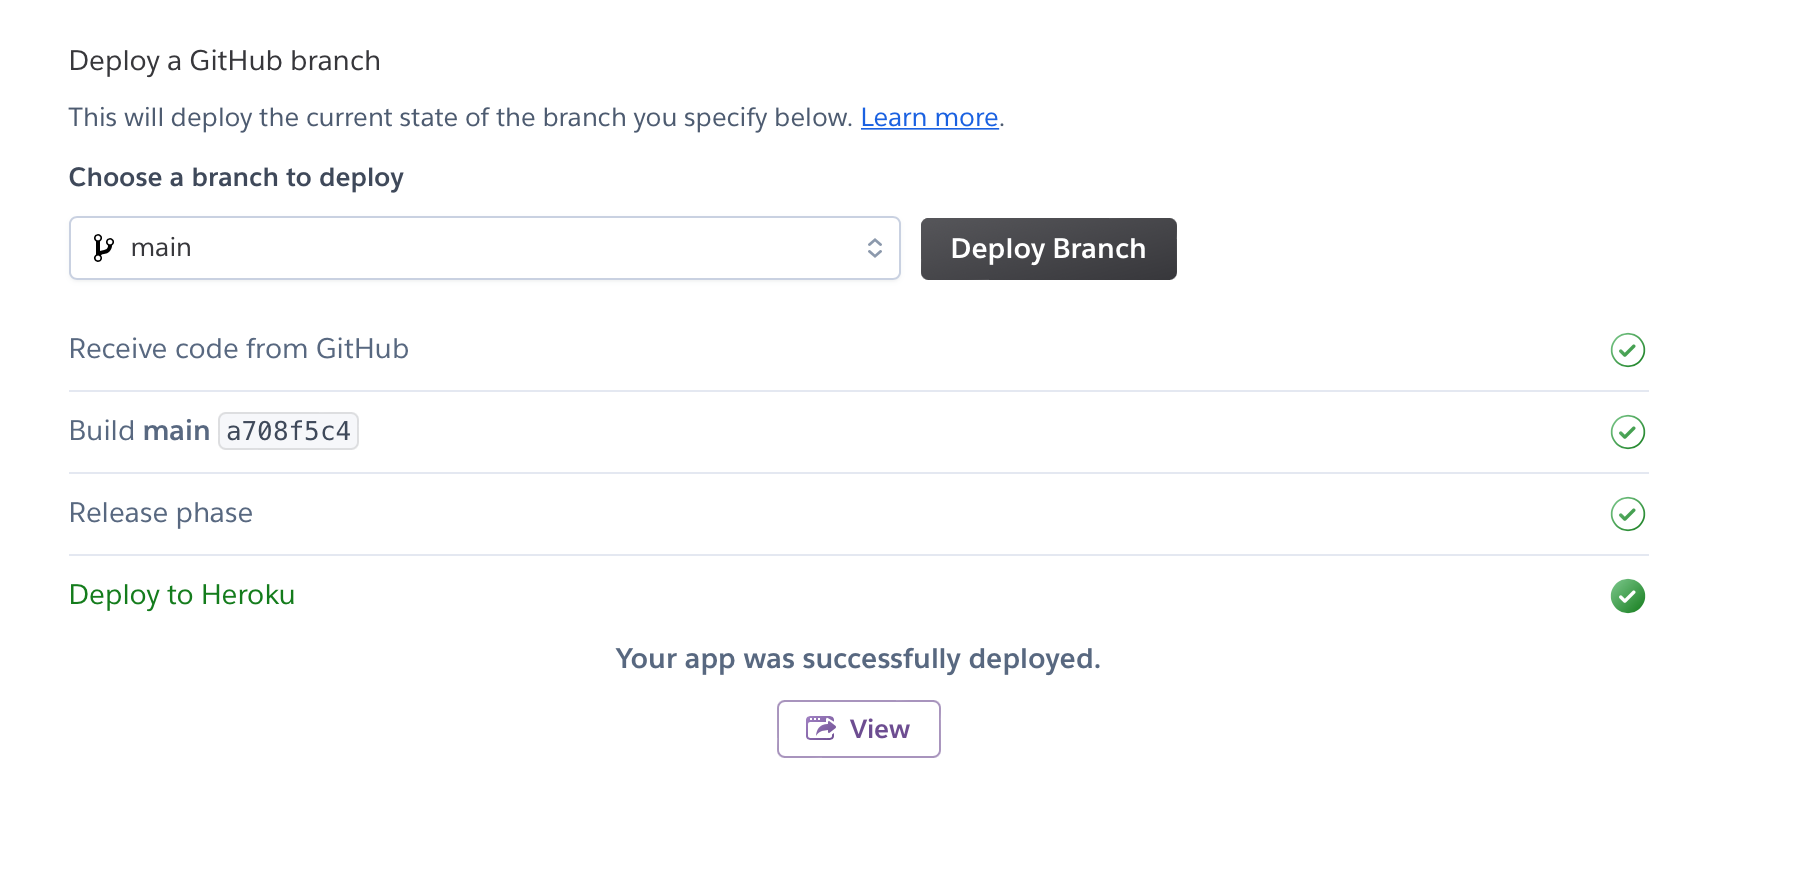
Still in the "Deploy" tab, scroll down to "Manual deploy" and deploy!
The deploy may take a few minutes, make a coffee and when you see the "View" button you're ready to go! Click "View" and your browser will open the updated Lightdash app.
4. Next steps
Once you've completed steps 1-4 it's much easier to get future updates.
To update your heroku app, head over to your github fork and press "fetch upstream". This will update your fork and then either:
- Repeat Step 3 and manually deploy
- Configure your Heroku app to deploy automatically when you update your fork